Welcome. If you're tackling an overhead door installation in Texas or Oklahoma, this guide is your new playbook. Whether you're a business owner securing a commercial facility or a homeowner planning a major upgrade, a precise installation is non-negotiable. It’s the foundation for safety, security, and long-term reliability. This data-driven overhead door installation guide goes beyond the manufacturer's manual, walking you through the entire process from site prep to final safety checks that meet industry standards.
Setting the Stage for a Flawless Installation
A proper overhead door installation is a game of precision. For homeowners, a new garage door is one of the smartest investments you can make. In fact, a 2023 cost vs. value report revealed a garage door replacement can recoup over 102.3% of its cost at resale in the South Central U.S., which includes Texas and Oklahoma. The curb appeal is a huge bonus, but the real win is a door that operates safely and smoothly for years.
For a business, the stakes are exponentially higher. A commercial door that fails can halt operations, create security vulnerabilities, and become a serious liability. OSHA regulation 1910.212(a)(1) mandates machine guarding to protect operators, and an improperly installed overhead door is a common source of workplace accidents. Getting the setup right isn't just a matter of convenience—it's about protecting your people, your assets, and your bottom line.
Understanding the Core Components
Before picking up a tool, you need to understand the system. An overhead door is an assembly of interdependent parts, each with a critical job.
Here’s a quick rundown of the key components you’ll be working with:
- Door Sections: The primary panels that form the door's structure, typically made from steel, aluminum, or wood.
- Tracks and Rollers: The metal guides on the sides and ceiling (tracks) and the wheels attached to the door (rollers) that facilitate smooth movement.
- Torsion Spring Assembly: The system's powerhouse and its most dangerous component. The springs are under extreme tension to counterbalance the door's weight, making it liftable.
- Hardware and Reinforcement: This includes all hinges, brackets, cables, and struts that hold the door together and connect it to the spring system.
The Critical Difference Between Residential and Commercial
While the principles are similar, residential and commercial doors are engineered for vastly different demands. A standard two-car garage door might weigh a few hundred pounds. A commercial roll-up door for a North Texas warehouse? That can easily top 1,000 pounds and cycle hundreds of times per day.
The real split is in the engineering. Commercial doors are built for high-cycle abuse, with thicker gauge steel, industrial-strength hardware, and heavy-duty springs. Residential doors, on the other hand, prioritize aesthetics, insulation (R-value), and quiet operation.
This difference dictates the entire installation process. A commercial job in a Texas industrial park or an Oklahoma farm shop requires specialized lifts, must adhere to stricter building codes, and almost always demands a certified crew. For example, commercial fire-rated doors must comply with NFPA 80 standards, a requirement unheard of in a residential setting.
This guide will cover both worlds, providing the practical, actionable tips to either confidently manage a professional crew or decide if a DIY job is genuinely feasible. We'll cut through the technical jargon and focus on clear steps that align with key safety standards like UL 325, the federal safety standard for garage door opener operation.
Your Pre-Installation Site and Tool Checklist

Before you turn a single wrench, the most critical work of an overhead door installation begins. The project's success hinges on what you do before the door sections come out of the box. Proper preparation separates a smooth, safe installation from a day of costly mistakes and headaches. This isn't just about moving a car; it's a methodical audit of your structure, space, and equipment.
The demand for installers who get this right is surging. The global garage door market was valued at a staggering USD 20.92 billion in 2023 and is projected to hit USD 28.85 billion by 2030. This growth drives higher standards and leaves no room for error, starting with these foundational steps.
Accurate Measurements Are Non-Negotiable
There is zero room for guesswork in this business. More projects are derailed by bad measurements than any other single issue. You must measure the finished opening—width and height—down to the fraction of an inch.
But that’s just the start. The surrounding space is equally critical. Here’s what you need to measure with absolute precision:
- Side Room: The clear space from the edge of the door opening to the nearest wall or obstruction. A standard residential door typically needs at least 3.75 inches, but heavy commercial doors or specialized track systems may require double that or more.
- Headroom: The distance from the top of the finished opening to the lowest point on the ceiling (e.g., a rafter, pipe, or ductwork). Most standard setups require 10 to 12 inches of headroom to function correctly.
- Backroom: You need sufficient depth for the door to open completely without obstruction. Measure from the opening back into the room. As a rule of thumb, ensure you have the door’s height plus at least 18 inches of clear space.
Structural Integrity and Site Readiness
You cannot assume a structure is ready to handle the weight and torque of a new door system, especially with older homes in Texas or repurposed commercial buildings in Oklahoma. The door jambs—the vertical framing on each side of the opening—must be perfectly plumb, solid, and securely anchored.
Actionable Tip: Before installation day, physically inspect the framing. Look for any signs of rot, water damage, or warping. A heavy commercial door exerts immense force on its frame, and a compromised structure is a recipe for catastrophic failure.
Once you’ve confirmed the structure is sound, clear the entire work area. You need enough floor space to lay out every door section and all hardware. This means moving vehicles, equipment, and stored items to create a clean, level, and safe workspace.
The Right Tools for the Job
Showing up to a job site with inadequate equipment is a rookie mistake that compromises safety and work quality. While some tools are universal, the demands of a heavy-duty commercial installation are a world apart from a standard residential job. For pros tackling larger projects, exploring construction equipment financing options can be essential for acquiring the forklifts or scissor lifts needed to work safely and efficiently.
Before you start, ensure you have the right gear on hand. What you need varies significantly between a simple residential door and a massive commercial one.
Essential Tools and Materials Checklist
Here's a practical comparison of typical tool requirements for both types of installations.
| Tool/Material | Residential (Standard) | Commercial (Heavy-Duty) |
|---|---|---|
| Drill/Driver | 18V or 20V cordless drill with socket attachments | High-torque impact wrench and heavy-duty hammer drill |
| Ladders | Sturdy 6-foot or 8-foot stepladder | Scissor lift, scaffolding, or multiple extension ladders |
| Winding Bars | 1/2-inch solid steel bars (manufacturer-provided) | 5/8-inch or larger solid steel bars for high-tension springs |
| Clamps | C-clamps or locking pliers | Heavy-duty welding clamps and vise grips |
| Level | 4-foot level | 6-foot level or laser level for precision over long spans |
| Safety Gear | Safety glasses, gloves, steel-toed boots | Hard hat, high-visibility vest, and fall protection harness |
Having the right tools is half the battle. The other half is ensuring all your materials are present and correct.
Actionable Tip: As soon as the door is delivered, inventory every single part. Don't wait until you're halfway through the job. Lay everything out, grab the manufacturer's manual, and check each item against the packing list. Discovering a missing hinge or an incorrect roller mid-installation can bring your entire project to a screeching halt.
Assembling the Door and Tracks
Alright, you've got your site prepped and your tools laid out. Now begins the assembly, where meticulous attention to detail pays off. Every measurement, every bolt, directly affects how smoothly and safely that door operates for years to come.
The demand for this kind of precision work is only growing. The global overhead door market, despite a 1.6% dip in 2020, is on a serious upswing. It's expected to climb from USD 6.99 billion in 2022 to an impressive USD 9.94 billion by 2029. That's a lot of doors needing quality installation. If you're interested in the numbers, you can dive into the full market analysis to see the trends driving this growth.
The Foundation: Placing the First Section
Everything starts with the bottom section of the door. This piece is your foundation—it dictates the alignment for the entire system. Before lifting it, attach the bottom brackets and weather stripping, following the manufacturer's guide to the letter.
Once it's ready, carefully set the first section in the door opening. Center it perfectly. Break out the tape measure and ensure the gap is exactly the same on both sides. Then, place a level on it to confirm it's dead-on horizontal. If it's even slightly off, every subsequent section will inherit that error, leading to a door that binds, scrapes, and wears out prematurely.
This image gives you a solid visual breakdown of where your time will be spent getting the tracks set up.
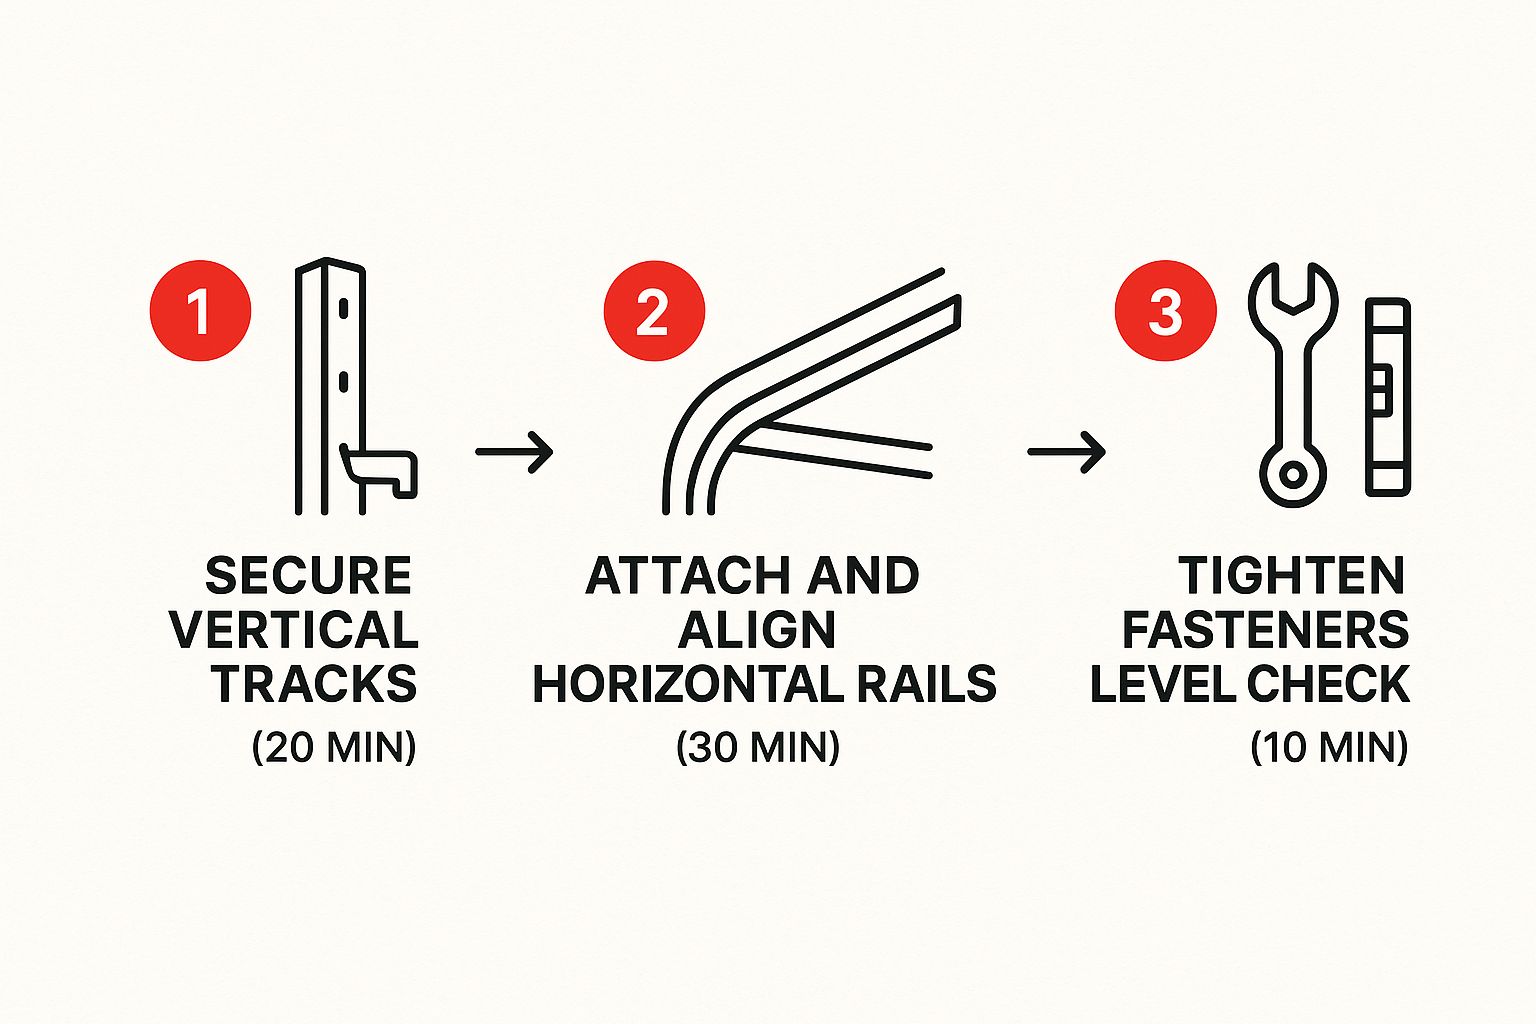
As you can see, aligning and leveling is the most time-consuming part. That’s your cue to slow down and get it right.
Mounting the Vertical Tracks
With the bottom section perfectly placed, you can move on to the vertical tracks. These are the guides that carry the door, and they must be perfectly plumb (vertical). Check them, double-check them, and then check them again with your level.
Slide the rollers of the bottom section into the tracks. Now, loosely fasten the tracks to the door jambs with lag screws. Don't tighten them fully yet; leaving them slightly loose provides crucial wiggle room for adjustments as you add more sections.
A classic mistake I see on jobs all over Texas and Oklahoma is rushing the vertical track alignment. If those tracks aren't perfectly plumb, the door will fight you every inch of the way. It’ll rub, scrape, and put unnecessary strain on the opener and rollers.
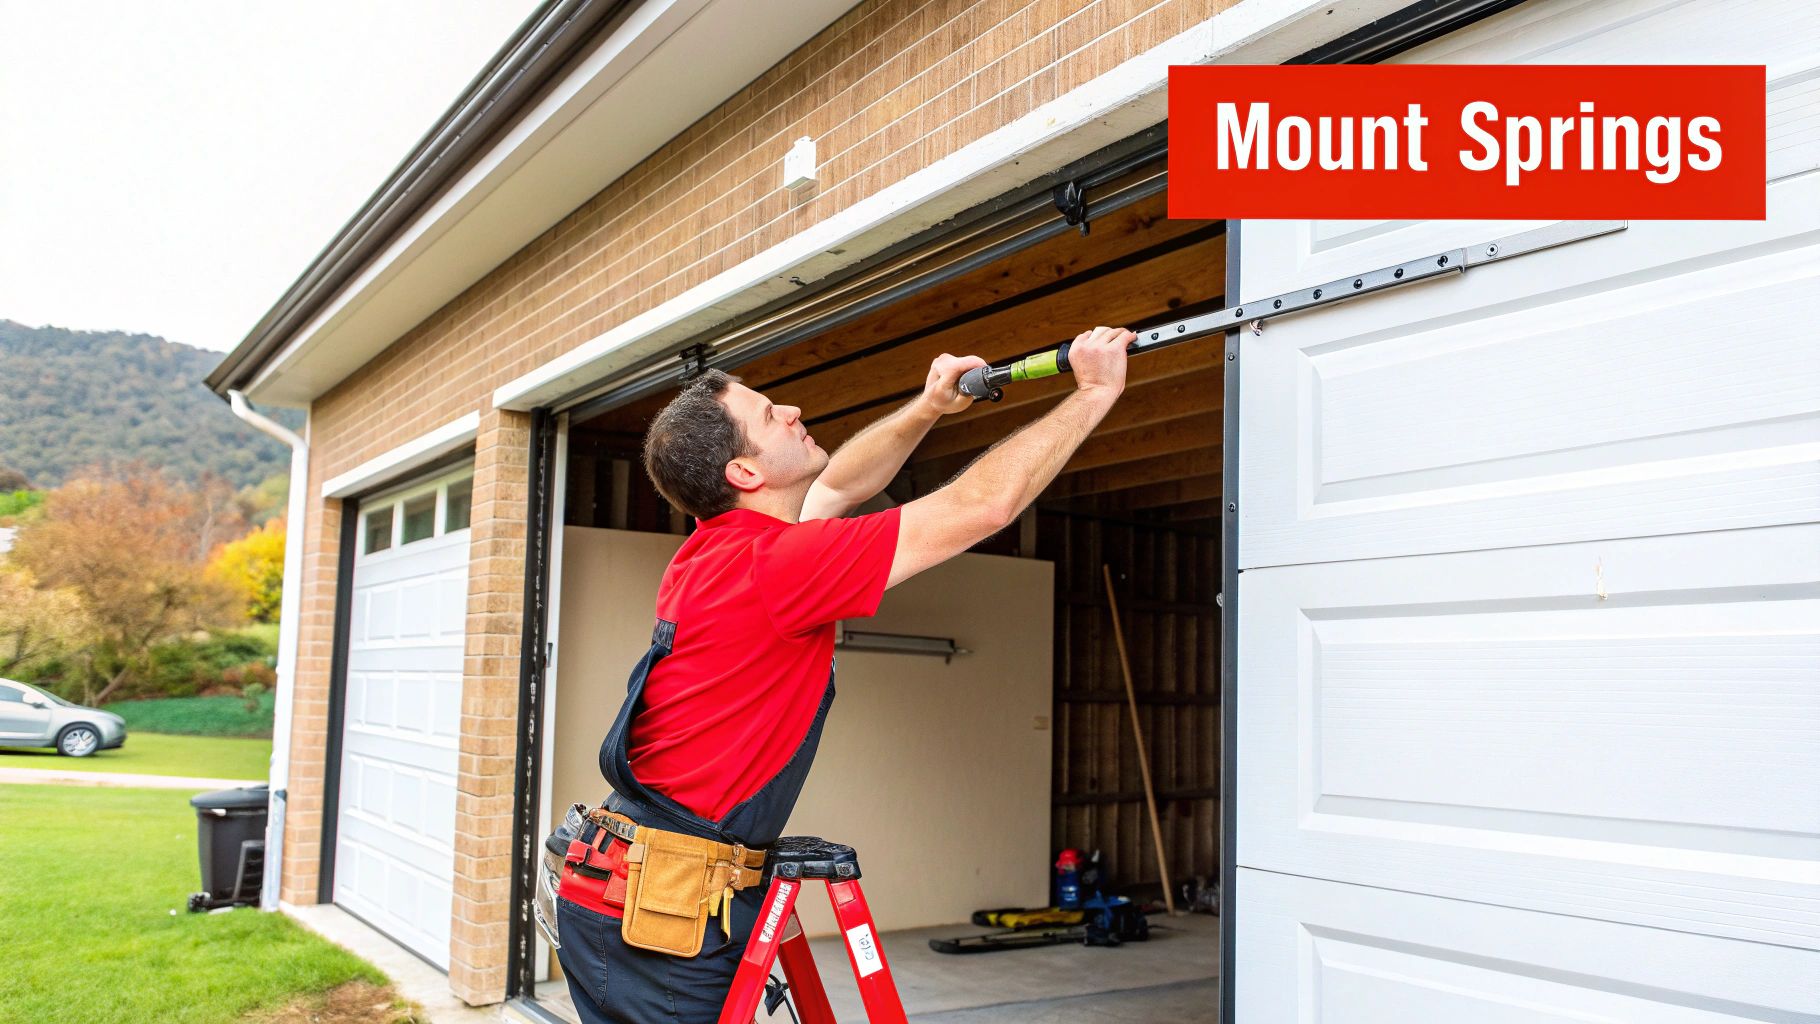
Now you can start stacking the remaining door sections one at a time, installing the hinges and rollers as you go. For a heavy commercial door, this is absolutely a two-person job and often requires a forklift. Be careful here—a dropped or mishandled panel means a permanent dent or scratch. If a large door is giving you trouble, our team is fully equipped to handle a professional commercial overhead door installation.
Aligning the Horizontal and Curved Tracks
Once all the sections are stacked and hinged, it's time to connect the rest of the track system. The curved piece is what makes the transition from vertical to horizontal travel possible, so its alignment is critical for smooth operation.
Attach the horizontal tracks to the curved sections and then secure the back ends to your ceiling joists or support brackets. This is where that backroom measurement you took earlier becomes essential. The tracks must be parallel to each other and have a very slight downward slope toward the back of the garage—think about a half-inch drop for every 10 feet of track.
This gentle slope uses gravity to your advantage, helping hold the door firmly closed. Use your level to confirm the angle and a tape measure to ensure the distance between the two tracks is consistent from front to back.
- Check for Parallelism: Measure the gap between the horizontal tracks at the front, middle, and back. All three measurements should be identical.
- Verify the Slope: Lay your level along the top of the track to check for that slight downward pitch.
- Confirm Squareness: A pro tip is to measure diagonally from corner to corner of the track assembly. If the two diagonal measurements match, your system is square.
With everything perfectly aligned, you can go back and tighten all the lag screws and fasteners on the entire track system. Aim for a snug, secure fit, but don't overtighten and risk crushing the track or wood framing.
For homeowners looking to skip the hassle, we offer a comprehensive residential garage door installation service to get it done right. And if your existing door is already binding or making noise, that’s a tell-tale sign of track misalignment that needs professional garage door repair.
Safely Navigating the Torsion Spring System
Alright, let's discuss the part of the job that demands your full, undivided attention: the torsion spring system. This is the powerhouse that makes a door weighing hundreds of pounds feel nearly weightless by storing an incredible amount of raw mechanical energy.
Get this part wrong, and things can go sideways in a hurry. According to the U.S. Consumer Product Safety Commission, tens of thousands of injuries are associated with garage doors annually, and many of the most severe incidents involve high-tension springs. This is one area where you absolutely cannot afford to guess or take shortcuts.
How Torsion Springs Actually Work
The physics are elegantly simple. As the door closes, cables attached to the bottom corners wind around drums, which in turn twist—or "load"—the spring. This winding action stores potential energy. When you open the door, the spring unwinds and releases that energy, doing the heavy lifting.
It's a powerful system that must be respected. The force is so immense that if a winding bar slips during tensioning, it can be launched with enough force to cause serious, even fatal, injury.
A Critical Word of Warning: I can't stress this enough. Never, ever attempt to wind a torsion spring with anything other than a pair of proper steel winding bars designed for the job. I've heard horror stories of people using screwdrivers or rebar. Those tools will fail under the torque, and the result is disastrous.
Assembling the Torsion System
Before you can add tension, the entire assembly must be correctly put together. Start by sliding the torsion tube through the springs and securing it to the end bearing plates above the door. The center bracket is crucial—it must be bolted securely to the wall header as it will handle the bulk of the spring’s force.
With the tube mounted, slide the cable drums onto each end. The final step before winding is to connect the lift cables, ensuring they are pulled taut and seated perfectly in the drum grooves.
- Cable Tension: Pull each cable hand-tight from the bottom fixture up to its drum. There should be zero slack.
- Drum Position: Orient the drums so the set screws are facing you for easier access. Do not tighten them yet.
- Lock Down the Tube: This is a key safety step. Use a pair of locking pliers or a C-clamp to lock the torsion tube tight against the header. This prevents it from spinning while you wind the first spring.
This entire assembly is a massive focus for manufacturers. The global overhead door market, which is on track to hit USD 8.78 billion by 2030, is led by North America, which commands 36% of 2024 revenue. That leadership is built on rigorous safety standards, especially after quality issues with imported springs put the spotlight on just how critical these components are. For a deeper dive, you can check out more on the global market and its safety standards.
The Winding Procedure, Step by Step
With everything assembled and locked down, it's time to add tension. Your door's manual will specify the exact number of turns the springs need, usually counted in quarter-turns.
- Seat the First Bar: Push a winding bar firmly into one of the bottom holes on the winding cone. Turn it upward 90 degrees—that's one quarter-turn.
- "Walk" the Bars: Insert your second bar into the next hole up to hold the tension. You can then safely remove the first bar and repeat the motion, "walking" the bars up to wind the spring.
- Count Your Turns: This must be exact. Over-winding will stress the system and lead to premature failure. Under-winding will leave the door dangerously heavy.
- Lock it In: Once you've hit the correct number of turns, tighten the set screws on the winding cone to the manufacturer's specified torque. This locks all that tension in place.
After finishing the first spring, repeat the process for the second one. Getting this right is what makes the door balanced and safe. For more tips, our guide on garage door spring tension adjustment is a great resource. The principles are the same for the large commercial doors we see across Texas, but the scale is much larger, often involving multiple springs that require special tools and certified expertise.
Fine-Tuning and Safety Checks: The Final Lap
Getting the door panels hung is a major milestone, but the job isn't done until you've meticulously calibrated and tested every component. This final phase separates a professional job from a liability waiting to happen. It’s where you turn hardware into a smooth, safe, and reliable system.
First, check the door's balance. This is non-negotiable. Disconnect the opener to operate the door by hand. You should be able to lift it smoothly with minimal effort. The real test? Lift it halfway and let go. A perfectly balanced door will stay put. If it slams shut or flies open, you have a spring tension problem that must be fixed immediately. An unbalanced door forces the opener to do all the work, which will burn out the motor in no time.
Dialing in the Opener's Brain
With the door balanced, you can program the opener itself. This is about setting the operational boundaries for safe use.
Start by setting the travel limits. These settings tell the motor precisely where to stop at the top (fully open) and bottom (fully closed). An error here risks the door slamming into the floor or trying to tear itself off the track.
Next is the force sensitivity. This is a critical safety feature mandated by the UL 325 federal safety standard. You are programming how much resistance the opener should encounter before it recognizes an obstruction and reverses. If the setting is too light, a strong gust of wind might trigger a reversal. If it's too heavy, you’ve created a serious crushing hazard.
Actionable Tip: The industry standard for this is the "one-inch block" test. Lay a 2×4 board flat on the ground where the door closes. When the descending door touches the wood, it must immediately reverse. If it continues to push, the force is set dangerously high and needs immediate adjustment.
Putting the Safety Systems Through Their Paces
Every modern opener has two external safety systems that act as the door's eyes. You must test both without exception.
- Infrared Safety Sensors: These are the small electronic "eyes" positioned a few inches off the floor on either side of the door opening. To test them, start the door closing and wave your foot through the invisible beam. The door should instantly stop and reverse to the fully open position.
- Contact Reversal: This is the backup system. As the door is closing, apply firm, steady upward pressure with your hands on the bottom edge. The motor should sense the resistance and immediately reverse.
For a business owner in Texas or Oklahoma, a failed safety test isn't just a repair issue—it's a potential OSHA violation and a massive liability risk. For a homeowner, it’s about protecting your family and property. Don't forget to double-check the electrical work, too. For a good refresher, take a look at these general electrical safety tips to ensure every connection is secure and properly grounded.
The Last Once-Over
Now that the safety systems are confirmed, it's time for one final pass. Grab your wrenches and go over every single nut and bolt again, ensuring they’re all tightened to the manufacturer's torque specs. The daily vibration of a garage door is notorious for loosening hardware, so making sure it's rock-solid from day one is key.
Finally, give all the moving parts—the rollers, hinges, and torsion spring—a coat of high-quality garage door lubricant. This simple step keeps the door running quietly, reduces wear and tear, and adds years to the life of the components.
Whether you're looking for a professional install from the ground up with our Our Commercial Overhead Door Services or want to upgrade your home when you Explore Residential Garage Door Installation, we've got you covered. And if your current door fails any of these crucial safety tests, it's time to call for a repair. Don't wait for a small issue to become a major accident—let us know if you Need Garage Door Repair?.
Got Questions? We’ve Got Answers.
After years of installing overhead doors for homes and businesses all over Texas and Oklahoma, our technicians have heard it all. You can read manuals cover-to-cover, but real-world questions always come up.
Here are the answers to the most common (and important) ones we get out in the field. This isn't just generic advice; it's practical insight learned from thousands of successful installations.
How Long Does an Overhead Door Installation Really Take?
This is usually the first thing people ask, and honestly, it depends. For a standard residential garage door, a seasoned professional can typically complete the job in 4 to 6 hours. This includes tear-out of the old door, prepping the opening, and commissioning the new system.
Commercial jobs are a different story. A large, heavy-duty door for a loading dock can easily take a full day, sometimes more. Factors like high-lift tracks for an auto shop, specialized openers, or integration with existing security systems will add to the timeline.
Actionable Tip for DIYers: If you're tackling this for the first time, block out an entire weekend. Rushing is your enemy. Giving yourself that extra time means you can work carefully, double-check the manual, and not cut corners on safety.
A rushed installation on a system this heavy is just asking for trouble.
Can I Just Reuse My Old Tracks and Save a Few Bucks?
I get why people ask this—it seems like a smart way to save money. But the answer is always a firm no. Your new door is a complete, balanced system. The manufacturer designed the tracks, rollers, springs, and every bracket to work together with the specific weight and engineering of your new door panels.
Trying to mix and match is a recipe for disaster.
- You'll compromise the balance. Old tracks will almost never align perfectly with new rollers, causing the door to bind, jerk, and run rough.
- You'll cause premature wear. Mismatched parts put immense strain on the opener motor and other components, leading to breakdowns much sooner than expected.
- It's a serious safety risk. This is the big one. Old tracks are not rated for your new door's weight. A catastrophic failure could cause the door to come crashing down.
Do yourself a favor and use the hardware that comes in the box. Not only is it the only safe way to do it, but it's also required to keep your new door's warranty intact.
What are the Classic DIY Installation Mistakes to Avoid?
We see many well-intentioned DIY projects, but a few mistakes appear consistently. The absolute biggest is attempting to adjust torsion springs without the proper tools. Winding or unwinding those springs is, without a doubt, the most dangerous part of the job and should only be handled by a trained professional.
Other common slip-ups include:
- Not getting the tracks perfectly plumb and level. This is the primary cause of doors that bind, scrape, and make excessive noise.
- Overtightening the hardware. It's easy to do, but it can strip screws, crack brackets, and even damage the door panels themselves.
- Setting the safety reversal features incorrectly. This is a huge safety violation and contravenes UL 325 safety standards.
The best way to sidestep these problems? Read the manual. Then read it again. Follow it to the letter.
When Is It Time to Throw in the Towel and Call a Pro?
Knowing your limits is a sign of intelligence, not weakness. If you look at that torsion spring system and feel even a hint of hesitation, that's your cue. Stop what you're doing and call a professional. Your safety is worth far more than any service call fee.
You should also bring in an expert for any non-standard installation. We’re talking about garages with low-headroom tracks, high-lift conversions, or massive, custom-built doors. If your garage has any structural quirks or you need a commercial fire-rated door installed, professional expertise isn't just a good idea—it's essential for a safe and code-compliant job.
At Overhead Door Co. of Tex-Oma, we know that a great door is only as good as its installation. For us, a proper install is the foundation for years of reliable service. Whether you're a homeowner in Lawton or a business in Denison, our certified pros are ready to get it done right the first time. Contact us today to schedule your professional installation.
