Learning how to clean your garage door tracks is a straightforward maintenance task that directly impacts your door’s performance and longevity. The process involves a simple visual inspection, clearing debris with a vacuum and cloth, and a final wipe-down. Critically, the goal is to lubricate the moving parts (like rollers and hinges), not the track itself, and always use a non-petroleum-based, garage-door-specific lubricant.
This isn’t just busywork—it’s one of the most effective ways to prevent noisy, jerky operation and extend the life of your entire garage door system.
Why Clean Tracks Are Critical for Door Health and Safety
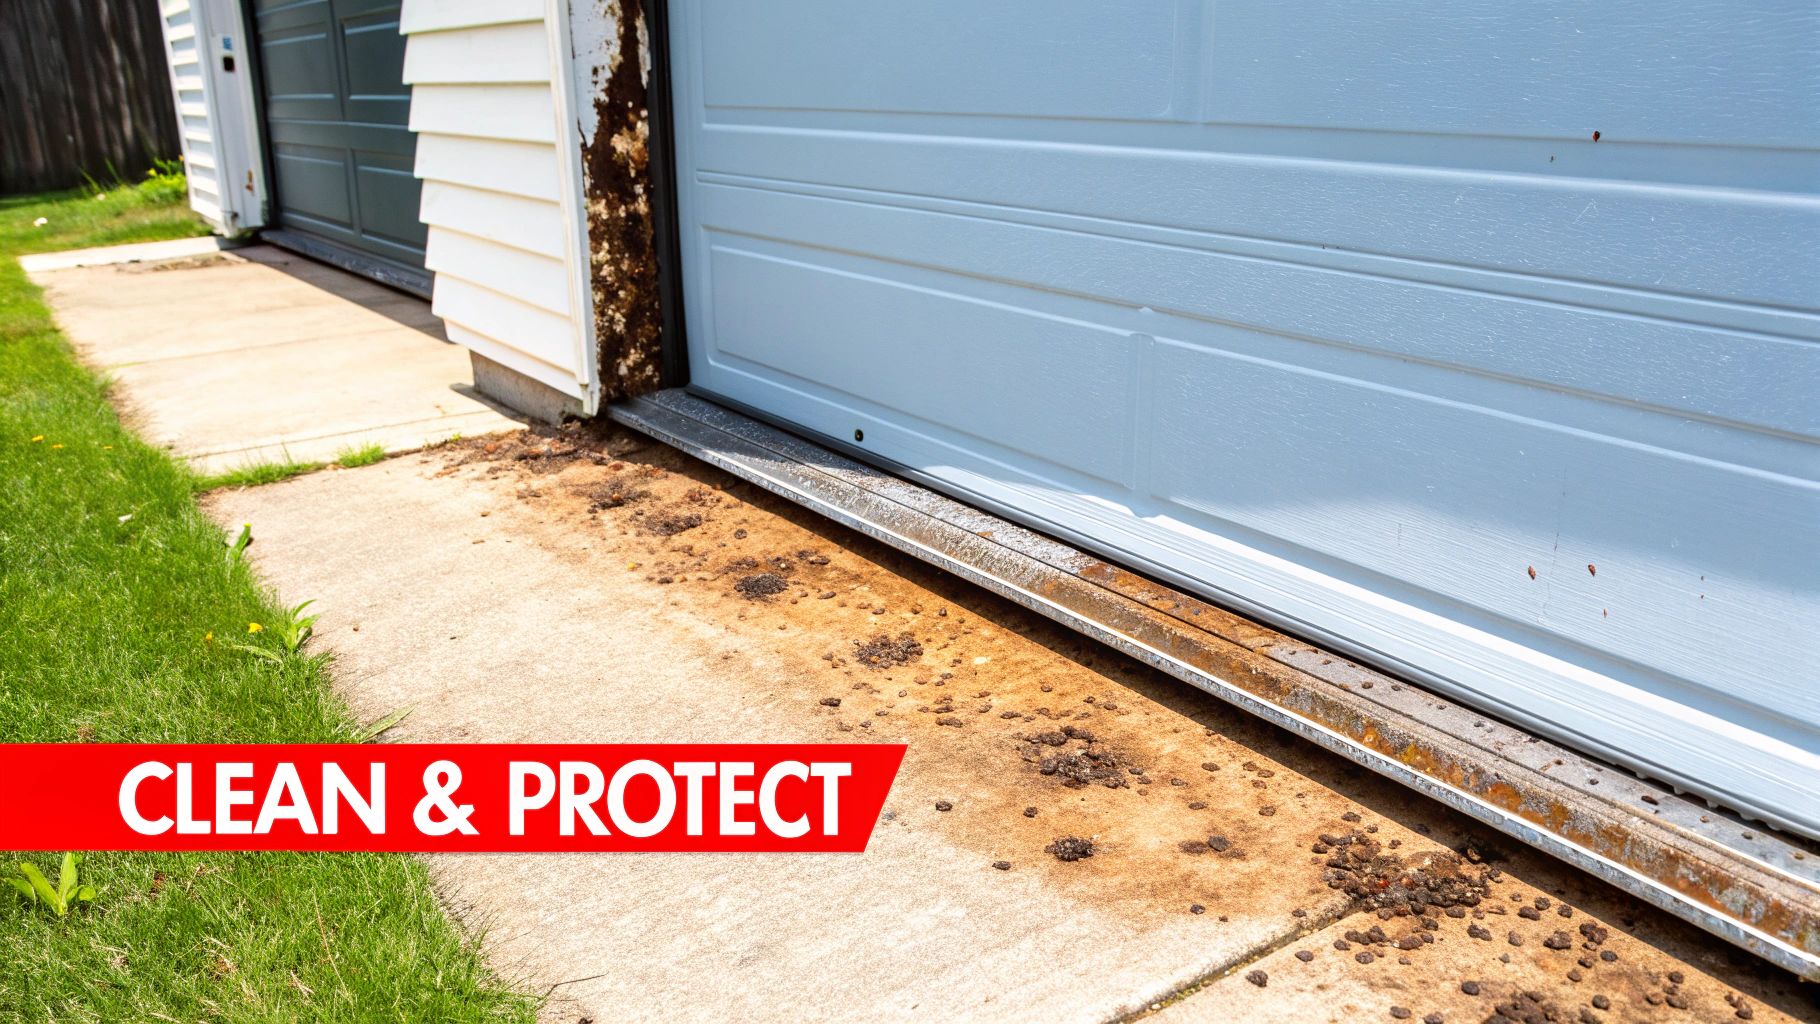
When a garage door exhibits performance issues, the problem often originates with dirty, obstructed tracks. They act as magnets for dust, grime, leaves, and other debris. Over time, this buildup compacts, impeding the rollers’ movement and placing significant strain on the opener motor, cables, and springs.
This isn’t just an annoyance; it’s a direct threat to the lifespan and safety of your garage door.
In Texas and Oklahoma, environmental factors like fine dust, pollen, and red clay soil accelerate this buildup. This forces the opener to work harder, leading to premature wear on its motor and gears. Industry data shows that a garage door opener motor under constant strain can see its lifespan reduced by up to 40%. Ignoring this simple cleaning task is one of the fastest ways to turn a small maintenance job into an expensive garage door repair call.
Before we dive into the steps, here’s a quick overview of what to expect.
Garage Door Track Cleaning At a Glance
This table breaks down the essentials for the job, providing a clear benchmark for time commitment, tools, and the return on your maintenance investment.
| Aspect | Recommendation |
|---|---|
| Time Required | 15-20 minutes for a thorough job. |
| Frequency | At least twice a year; quarterly in the dusty environments common to Texas and Oklahoma. |
| Essential Tools | Shop vacuum with a crevice tool, microfiber cloths, brake cleaner or an approved mild solvent. |
| Primary Benefit | Prevents friction and strain, ensuring smooth and quiet door operation. |
| Long-Term Gain | Extends the life of your rollers, cables, and garage door opener, potentially saving hundreds in premature replacement costs. |
As you can see, it’s a small investment of time for a significant return in performance and longevity.
The Real-World Impact of Regular Track Cleaning
Proactive cleaning is a critical decision for both safety and your budget. A smooth-running door is a safer door—a vital consideration given that the garage is the primary entry point for over 70% of homeowners. A door that sticks or jams due to dirty tracks can become a serious hazard, violating the basic safety principles outlined in standards like UL 325, which governs garage door opener safety.
This principle is equally vital in a commercial setting. I recall a situation with a busy Dallas distribution center experiencing operational delays because a high-cycle commercial door would jam.
The root cause? An accumulation of warehouse dust and debris compacted into the lower track curves. After an emergency repair that cost them significantly in both service fees and operational downtime, they implemented a quarterly track cleaning schedule. That one procedural change eliminated unexpected failures, saving them thousands over the next year in lost productivity and repair costs.
That story underscores a core industry truth: scheduled maintenance is always more cost-effective than reactive repair. For your home or business, keeping garage door tracks clean is a fundamental step toward a reliable and safe system.
Of course, track cleaning is just one piece of a comprehensive strategy. To get a wider perspective on keeping your home’s systems in top shape, it’s worth exploring professional proactive maintenance solutions that cover all the bases.
Gathering Your Gear and Prepping for a Safe Job
Before beginning any work, proper preparation is non-negotiable. Taking a few minutes to gather the correct supplies and establish a safe workspace is the difference between a smooth, successful job and a frustrating, potentially dangerous one.
Think of it like any skilled trade—you wouldn’t start a project without your toolkit laid out. Proper prep prevents scrambling up and down a ladder mid-job and ensures you can work efficiently and safely.
The Right Tools for the Job
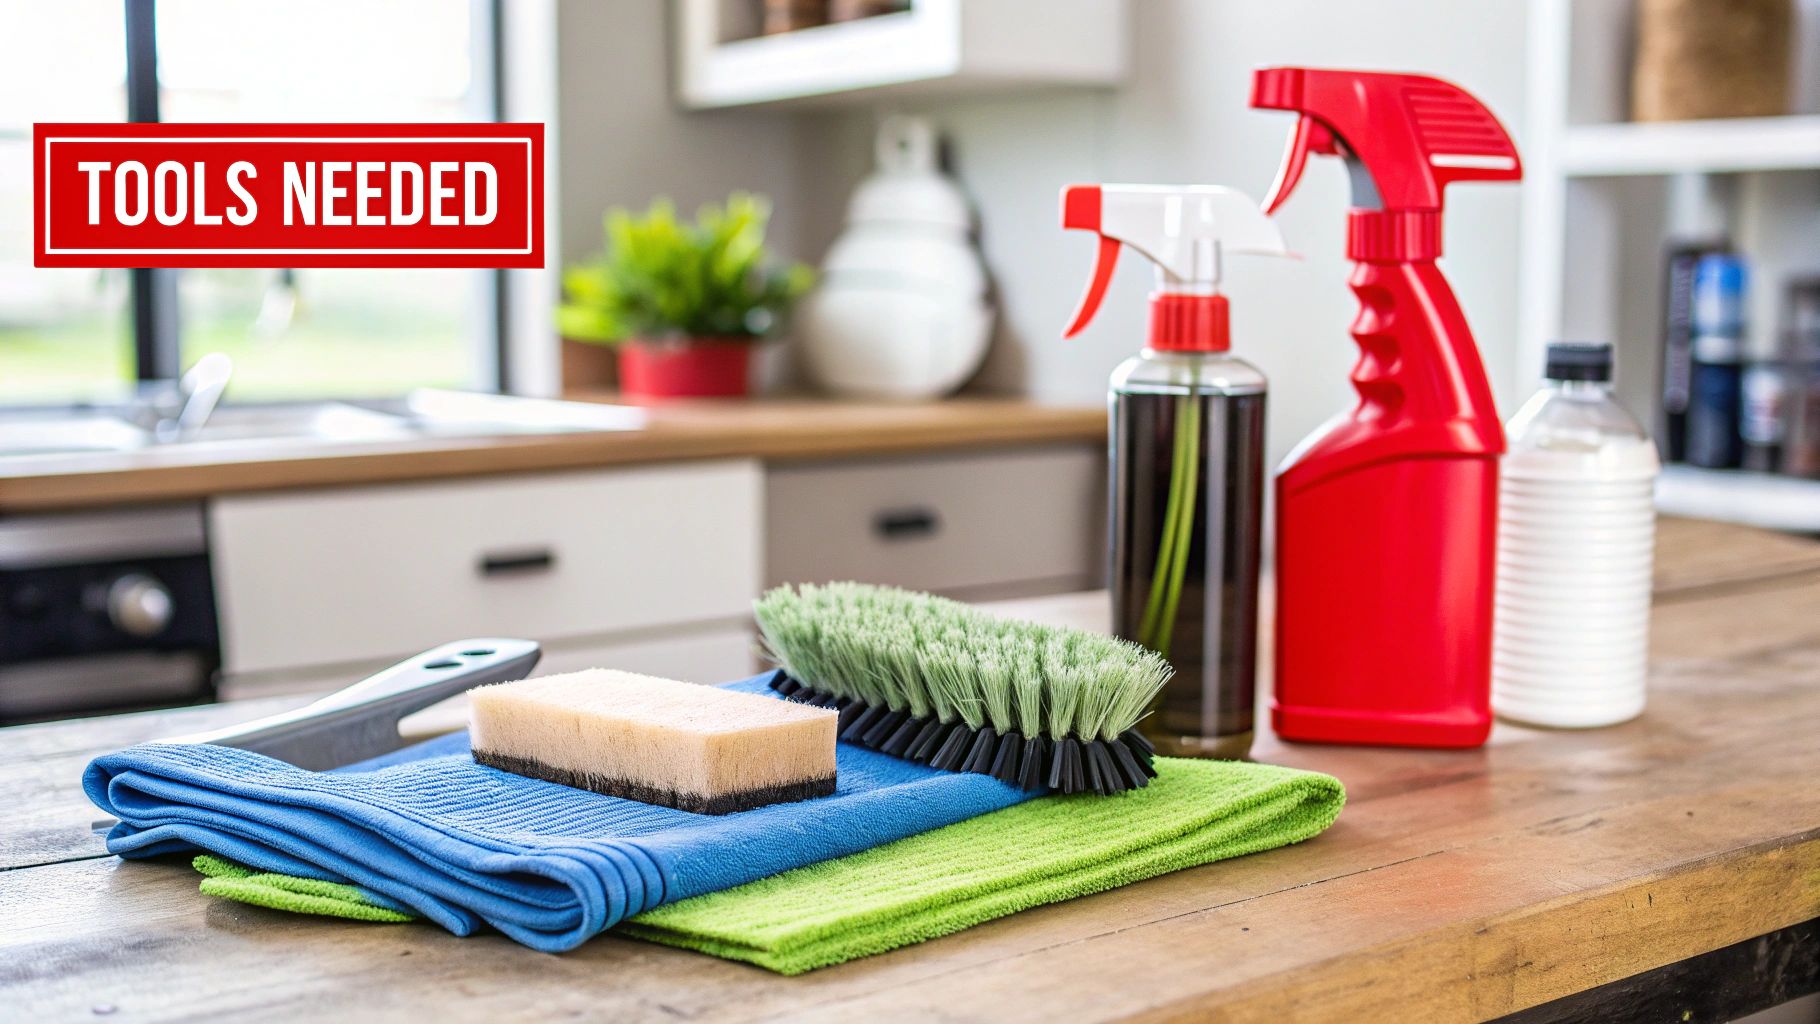
Having the correct equipment separates a frustrating afternoon from a straightforward maintenance task. Here’s a breakdown of what you’ll actually need and why each item is critical for cleaning your garage door tracks effectively.
- A Sturdy Ladder or Step Stool: You’ll need this to safely access the entire length of the tracks. Ensure it’s placed firmly on a level surface before climbing.
- Shop Vacuum with a Crevice Tool: This is your primary tool for removing loose dirt, cobwebs, and debris without smearing it.
- Microfiber Cloths and a Bucket: Use at least two cloths—one for applying your cleaning solution and a separate, dry one for wiping the tracks down. The final dry wipe is crucial for preventing rust.
- Brake Cleaner or a Mild Solvent: Brake cleaner is highly effective as it cuts through grease and grime but evaporates quickly, leaving no oily residue that can attract more dirt.
- A Garage-Door-Specific Lubricant: This is a key point. Avoid products like WD-40. They are primarily solvents, not long-term lubricants, and can attract dust, creating a sticky residue that worsens performance. You need a silicone or lithium-based lubricant formulated for garage doors. We offer several professional-grade options on our garage door accessories page.
Safety isn’t just a suggestion; it’s a requirement. The most common DIY injuries I see come from skipping simple precautions. Always put your well-being ahead of speed.
Essential Safety Protocols
First, de-energize the system. Unplug your garage door opener from the wall outlet. For commercial doors in Texas or Oklahoma, you must follow OSHA lockout/tagout procedures (29 CFR 1910.147) to ensure the power source cannot be re-energized accidentally.
With the power off, secure the door. Never work on tracks with the door held up by the opener alone. Close the door completely. If you must work with it partially open, securely clamp a pair of locking pliers or C-clamps onto the track just above one of the bottom rollers to physically prevent unexpected movement.
Finally, use your Personal Protective Equipment (PPE). At a minimum, wear safety glasses to protect your eyes from falling debris and gloves to protect your hands from solvents and grime. These simple habits are fundamental to any safe maintenance routine.
For businesses needing consistent upkeep, our scheduled commercial garage door maintenance plans are a great solution. For homeowners who prefer a professional touch, our residential Garage Door Repair team ensures complete peace of mind.
A Practical Walkthrough for Cleaning Your Tracks
With your tools ready and safety measures in place, it’s time to begin. Cleaning your garage door tracks isn’t about aggressive scrubbing; it’s a methodical process of clearing existing obstructions to ensure the rollers can glide smoothly.
We’ll break this down into key stages: removing loose debris followed by a deeper clean of adhered grime. Taking your time here pays dividends in improved performance and system longevity.
This simple process flow highlights the key stages of cleaning your garage door tracks.
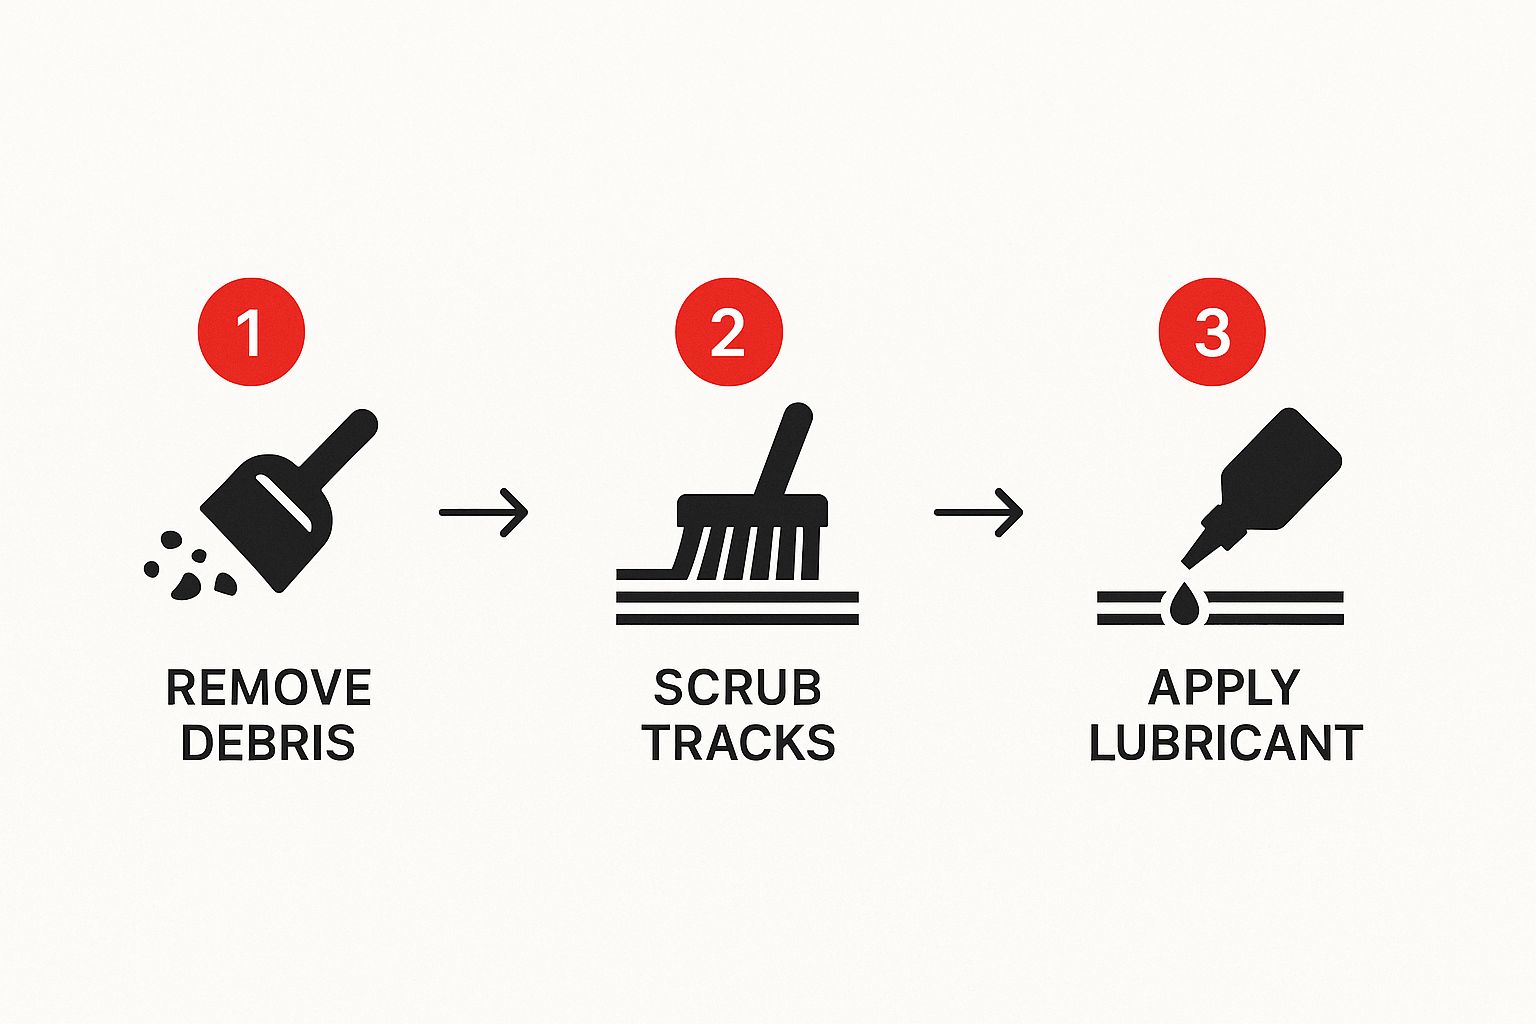
As you can see, it’s a straightforward method: clear loose debris, scrub away stubborn grime, and finish by lubricating the correct components.
First Pass: Inspection and Debris Removal
Begin by removing all loose material. Using your shop vacuum with the crevice tool, start at the top of one track and work your way down, suctioning out dust, cobwebs, and leaves. Pay special attention to the curved section at the bottom, where gravity causes debris to accumulate.
This step is also your first opportunity to inspect the tracks up close. Look for any small pebbles, packed dirt, or foreign objects the vacuum can’t remove. These are often the source of grinding noises.
I recall a job in Oklahoma City where the homeowner was convinced his opener motor was failing due to a loud grinding sound. The culprit was a small clump of compacted red clay wedged in the track’s curve. Once we dislodged it, the door operated silently. This is a common issue across Oklahoma and North Texas.
The purpose of this first pass is to eliminate anything that could become an abrasive paste when a cleaner is applied. A thorough vacuuming makes the next step significantly more effective.
Second Pass: Deep Cleaning the Grime
With loose debris gone, it’s time to address the caked-on, oily film that a vacuum can’t touch.
Take a microfiber cloth and apply a light spray of brake cleaner or your chosen solvent. Never spray cleaner directly onto the tracks. Overspray can drip onto the floor or the door itself, causing stains.
Starting at the top, wipe down the entire inner surface of the track. You will likely be surprised by the amount of black residue that comes off. Continually fold the cloth to a clean section to ensure you are removing grime, not just redistributing it.
For particularly stubborn spots, an old toothbrush can provide extra scrubbing power before the final wipe. After cleaning both tracks with the solvent, take your second, completely dry microfiber cloth and give them one last wipe-down. This is a critical final step to remove any remaining solvent and ensure the track is dry, which is your best defense against rust.
If you notice any significant issues during cleaning, such as dents or bent sections of track, this indicates a need for professional service. Our Garage Door Repair team has the specialized tools to safely correct these structural problems.
What to Inspect After You Clean
With your garage door tracks clean, don’t stop there. This is the perfect opportunity to conduct a quick but vital system health check. Think of it as preventative maintenance for your garage—spotting a minor issue now can prevent a major, costly failure later.
This post-cleaning inspection is what elevates basic upkeep to a comprehensive assessment of your door’s condition, revealing subtle signs of wear that were previously hidden by grime.
Checking Rollers and Track Alignment
Your first focus should be the rollers. With the tracks clean, each one is clearly visible.
Look for these red flags:
- Cracks or Chips: Closely inspect the nylon or steel wheel of each roller. Even a minor fracture can cause significant noise and jerky movement.
- Excessive Wobble: Gently wiggle a few rollers. A small amount of play is normal, but if one feels particularly loose in its stem, the bearings are likely failing.
- Uneven Wear: The surface of each roller should be smooth. Any flat spots or grooves indicate that they are dragging instead of rolling smoothly.
Next, step back and sight down the length of the vertical and horizontal tracks. They should be perfectly straight. Search for any bends, dents, or warping. Even a minor bend can create a tight spot that puts excessive strain on your garage door opener.
I remember a client with a Houston warehouse who discovered a slightly bent track during a routine cleaning. It was a subtle flaw, but it was causing their heavy-duty commercial lift cables to fray prematurely. Catching it early prevented a potential cable snap, which would have resulted in significant downtime and a dangerous safety hazard.
A clean track provides a clear view. It allows you to see the subtle signs of stress and wear that dirt and grease normally conceal. Don’t skip this opportunity to perform a quick diagnostic check.
Performing a Door Balance Test
With the tracks and rollers cleared, your final check is the door’s balance. This is critical. A properly balanced door should feel almost weightless, meaning the automatic opener is guiding it, not lifting its full dead weight.
First, ensure the door is fully closed. Then, pull the red emergency release cord to disconnect the door from the opener.
Now, carefully lift the door by hand to about waist-high. A well-balanced door will stay in place, hovering with minimal movement. If it slams down or drifts fully open on its own, your springs are out of balance and require professional adjustment.
This is especially important for the heavy, insulated doors common in Texas and Oklahoma. An unbalanced door of that weight forces the opener to do all the heavy lifting, which can burn out the motor years ahead of its expected service life.
If you discover any serious issues during your inspection, from bent tracks to an unbalanced door, it’s always best to call a professional. You can learn more about identifying these issues in our guide to common garage door repairs.
Common Cleaning Mistakes and When to Call a Pro
Even a straightforward task like cleaning garage door tracks has potential pitfalls. Knowing what not to do is as important as knowing the correct steps. A few common errors can create a sticky mess or, worse, mask a more serious problem.
The biggest mistake is over-lubricating the tracks. It seems logical: more lubricant equals smoother operation. In reality, the tracks are designed to be clean and dry. Applying lubricant inside the track channels creates a tacky surface that acts as a magnet for dust, dirt, and debris.
Soon, you have a gummy buildup that forces the rollers to drag instead of glide, putting unnecessary strain on your opener’s motor and defeating the purpose of cleaning.
Red Flags That Demand a Professional Eye
Another critical error is using the wrong cleaning products. Harsh chemical degreasers or abrasive cleaners can strip the galvanized coating off the steel tracks. This protective layer prevents rust; once it’s gone, corrosion can set in, compromising the structural integrity of the track system.
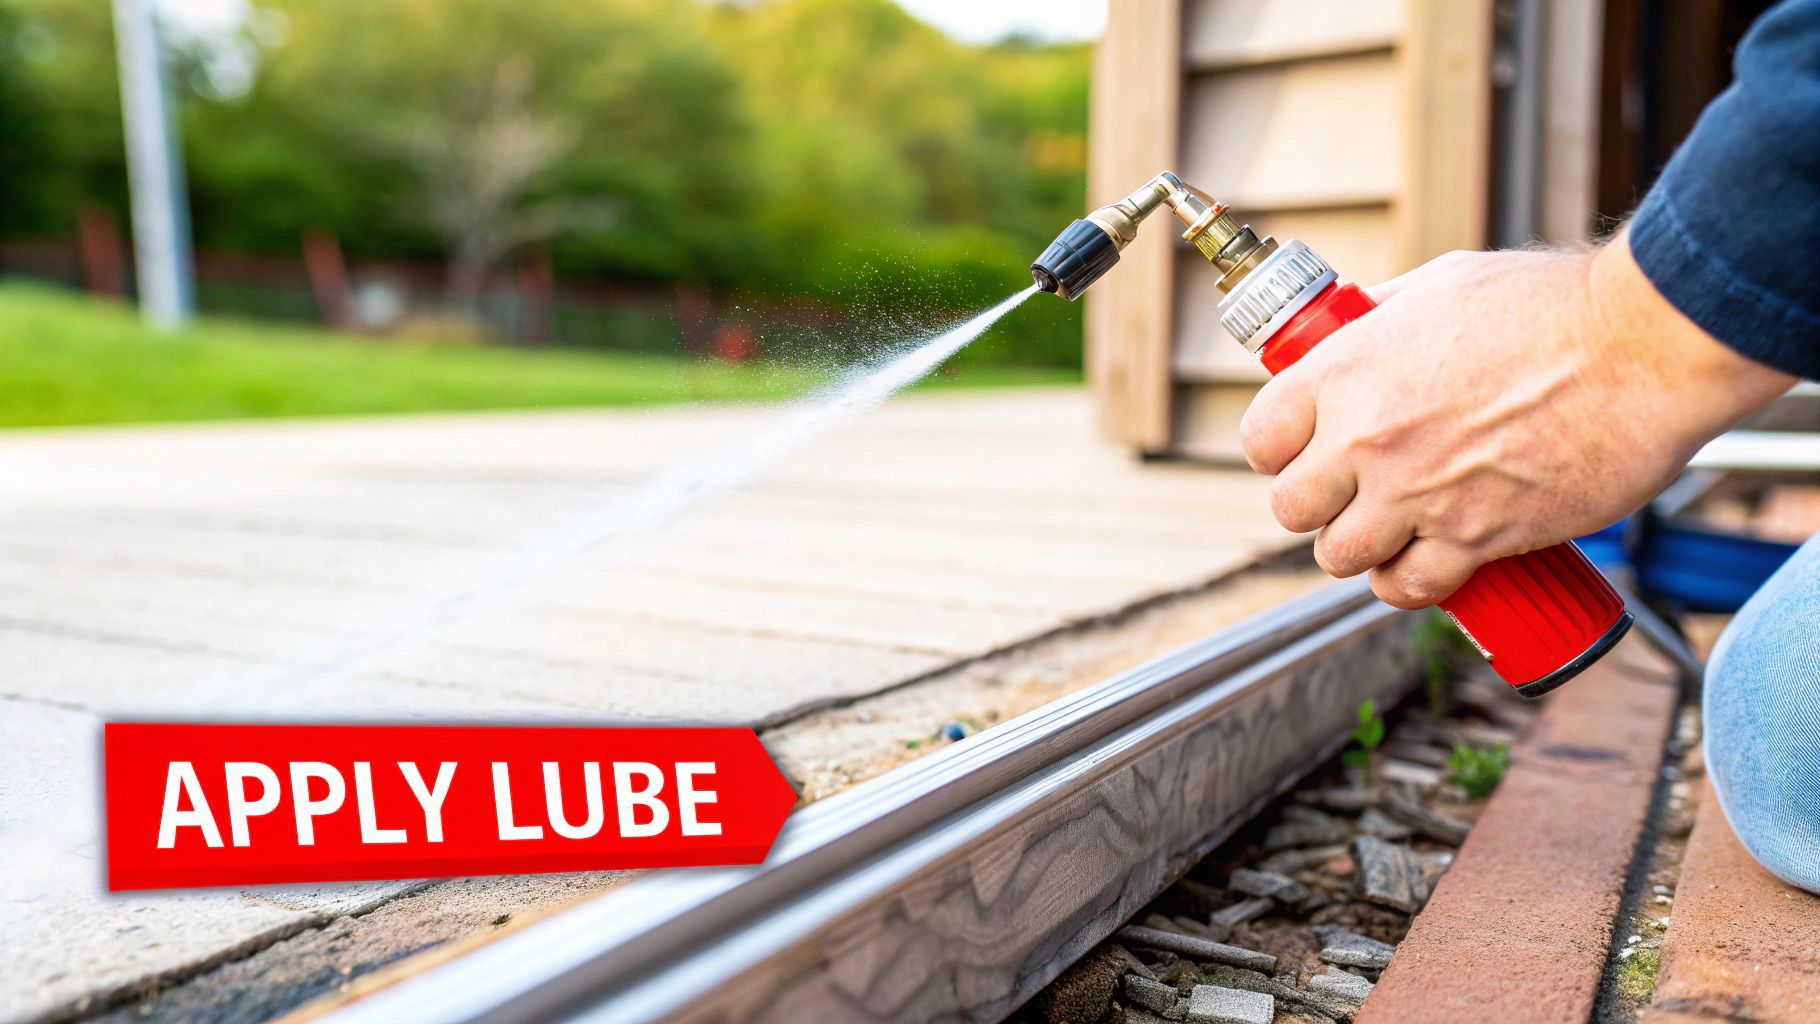
Remember, the goal is to clean, not create a new problem. A clean, dry track is a happy track. Lubricant belongs on moving parts—like roller stems and hinges—not the path they travel.
While DIY cleaning is perfect for routine upkeep, some situations are clear indicators that it’s time to call an expert. Your safety and the long-term health of your door system are paramount. Ignoring these warning signs can lead to serious injury or far more expensive repairs.
Here are issues that should prompt a call to a professional:
- Bent or Warped Tracks: If you see a dent or any sign of misalignment, this is not a job for a hammer. Attempting to force a track back into shape can throw the entire system out of alignment, creating a serious risk of the door coming off its tracks.
- Frayed or Damaged Cables: The high-tension lift cables are under extreme load. If you see even a single broken strand, stop using the door immediately. These cables can cause severe injury if they snap.
- A Heavy or Unbalanced Door: If the door failed the balance test, the problem lies with the springs. Spring adjustment is one of the most dangerous garage door repairs and should only be performed by a trained professional.
- Malfunctioning Safety Sensors: If the door still operates erratically after a thorough cleaning, the issue could be electrical. Our guide on how to test garage door sensors can help, but if troubleshooting fails, a technician is needed to diagnose the root cause.
When the grime is too stubborn or you find a problem that’s more than simple cleaning, it helps to understand the value of hiring a professional cleaner for challenging tasks to get the job done right and safely.
DIY vs Professional Service: When to Make the Call
Knowing where to draw the line between a manageable task and a job requiring a trained professional is key. This guide will help you decide.
| Symptom | DIY Action | When to Call a Pro |
|---|---|---|
| Noisy Operation (Squeaking/Grinding) | Clean tracks and lubricate rollers, hinges, and bearings. | Noise persists after cleaning/lubrication; loud popping or banging sounds are present. |
| Jerky or Shaky Door Movement | Check for and remove debris in tracks. Inspect rollers for visible wear. | The door remains jerky after cleaning or appears to be catching on a specific spot. |
| Visible Grime and Debris | Follow the cleaning steps in this guide using a mild solvent and a rag. | Grime is caked on, possibly mixed with rust, and resists gentle cleaning. |
| Tracks Look Misaligned or Bent | Perform a visual inspection only. Do not attempt to adjust or hammer them. | Any visible bend, dent, or gap between the track and the wall. |
| Door Feels Heavy or Unbalanced | Conduct the manual balance test to confirm the issue. | The door fails the balance test in any way, indicating a dangerous spring issue. |
| Frayed or Snapped Cables | Stop using the door immediately. Do not touch the cables. | You see even one broken wire strand on a cable, or a cable has completely snapped. |
Ultimately, your safety is the top priority. If you feel even slightly unsure about tackling a problem, making that call to a professional is always the smartest move.
Answering Your Garage Door Track Questions
After cleaning, a few questions are likely to come up. Getting straight, practical answers is the best way to feel confident about your ongoing garage door maintenance. Let’s address some of the most common queries we hear from homeowners and business managers across Texas and Oklahoma.
How Often Should I Clean My Tracks?
Many guides recommend a yearly cleaning, but that advice is insufficient for our local climate. The constant dust in West Texas, the fine red Oklahoma soil, and heavy pollen seasons mean tracks accumulate debris much faster here.
For this reason, I advise inspecting your tracks every three to six months. A quick visual check will tell you if a full cleaning is needed, allowing you to stay ahead of performance issues. For commercial facilities with high-cycle doors, a documented quarterly cleaning schedule is a sound operational investment.
Choosing the Right Lubricant for Your Garage Door
This is a frequent point of confusion. The debate often centers on silicone versus lithium-based sprays. The simple answer is to always choose a dedicated garage door lubricant. These are typically a silicone or lithium blend specifically formulated to lubricate without attracting dust and grit.
A critical mistake is lubricating the inside of the tracks. You should never spray lubricant inside the track channel itself. It belongs on the moving, metal-on-metal contact points—the roller bearings, hinges, and springs. Spraying the track just creates a sticky residue that captures debris, making the problem worse.
And whatever you do, avoid using WD-40. It is more of a solvent and water displacer than a true, long-lasting lubricant, and it will attract grime. You can find appropriate high-performance lubricants and other useful items in our selection of garage door accessories.
Can Cleaning Alone Fix a Noisy Door?
In many cases, yes. An estimated 70-80% of grinding and squeaking noises are caused by debris in the tracks interfering with the rollers. Following the cleaning steps outlined here is always the most effective first step in troubleshooting noise.
If the noise continues after a thorough cleaning, it signals a deeper issue. The problem could be worn-out nylon rollers with failed ball bearings, or something as simple as loose track brackets causing vibrations. Listen closely: a high-pitched, consistent squeak often points to a need for lubrication, whereas a rhythmic clunking might indicate a bad roller or a panel alignment problem.
At Overhead Door Co. of Tex-Oma, we believe that an informed customer is an empowered one. Whether you’re handling your own maintenance or need a professional eye, our team is here to ensure your doors operate safely and reliably. For expert service or to discuss your next project, visit us at https://ohdctexoma.com.
