Programming your vehicle's built-in garage door opener is a small upgrade that delivers a significant improvement to your daily routine. For most homeowners and businesses in Texas and Oklahoma, it's a straightforward, three-step process you can complete in minutes.
Essentially, you will first clear existing codes, then train your car's HomeLink system using your current handheld remote, and finally, sync the vehicle with the garage door motor. Once finished, you can store that clunky visor remote away for good.
Your Quick Guide to Programming HomeLink
Whether you're setting this up for a newly constructed home in Abilene or syncing a new fleet vehicle to a commercial bay door in Lawton, the logic is the same. The goal is simple: get the HomeLink buttons in your vehicle to copy and transmit the same radio frequency signal as your current garage door remote.
It may sound technical, but the process is surprisingly intuitive.
The Three Core Phases of Setup
Let's walk through a common scenario for a Texas homeowner or Oklahoma business: a new vehicle needs to be connected to an existing garage. Here’s how the process breaks down.
-
Wipe the Slate Clean: First, erase any codes from previous programming. Press and hold the two outer HomeLink buttons for approximately 20 seconds until the indicator light flashes rapidly. This ensures a clean start.
-
Introduce the Remote: Now, grab your existing handheld garage door remote. Inside your vehicle, hold the remote 1-3 inches from the HomeLink button you wish to program. Press and hold both the remote button and your chosen HomeLink button simultaneously. Continue holding until the HomeLink indicator light transitions from a slow blink to a fast one. This confirms it has learned the code.
-
Make the Final Connection: This last step, often missed, is crucial for modern systems. You will likely need a stepladder. Press the "Learn" or "Program" button on your garage door motor unit. This button is often located near the antenna wire. You typically have about 30 seconds to return to your vehicle and press the just-programmed HomeLink button two or three times to finalize the synchronization.
This integrated convenience is a primary driver behind the automated garage door operator market, which is projected to reach $4.1 billion by 2028. It’s no surprise, considering the residential sector accounts for over 70% of sales—homeowners and businesses alike demand seamless automation.
For a deeper look into how vehicle remotes work in general, this guide on how to program auto keys is a fantastic resource.
HomeLink Programming At a Glance
Here’s a quick-reference table to help you visualize the entire process before you get started.
| Phase | Action Required | Practical Tip for Texans & Oklahomans |
|---|---|---|
| Preparation | Erase previous codes from your HomeLink system. | Hold the two outer buttons until the light flashes fast. This is a critical first step for both personal and fleet vehicles. |
| Training | Teach the HomeLink button using your handheld remote. | Hold the remote close and press both buttons simultaneously. A fresh battery in the remote ensures a strong signal. |
| Synchronization | Sync the HomeLink system with the garage door motor. | Press the 'Learn' button on the motor, then the HomeLink button in your car. This final step secures the connection. |
Having these steps in mind makes the actual programming a breeze. Now, let’s get into the specifics for different types of garage door openers.
Getting Your Vehicle and Opener Ready to Pair
Before pressing any buttons, a few moments of preparation can be the difference between a quick setup and a frustrating afternoon. Proper prep is the key to syncing your HomeLink on the first attempt.
First, confirm your vehicle is equipped with HomeLink. It sounds obvious, but verifying this in your owner's manual can save significant time and guesswork.
Finding What You Need
Next, locate the "Learn" button on your garage door opener’s motor unit—the box mounted to the ceiling. It’s typically a small, square button near the antenna wire. The color of this button is a critical indicator of its security technology, especially on major brands like Chamberlain or LiftMaster, which helps determine the specific programming sequence.
- Purple or Red/Orange Button: Usually indicates a Security+ rolling code system.
- Green Button: Often found on older, fixed-code "billion code" systems.
- Yellow Button: The hallmark of a modern Security+ 2.0 or MyQ-enabled system.
While you're on the ladder, replace the battery in your original garage door remote. A weak remote signal is the number one cause of programming failure. This is especially crucial for businesses in Texas and Oklahoma with large commercial door services, where signal integrity is essential for reliable daily operation. Ensuring equipment is properly maintained helps meet operational safety standards like those outlined by OSHA for commercial workplaces.
Actionable Tip: Park your vehicle just outside the garage, facing the door. This orientation provides the clearest, strongest signal path between the car, the remote, and the opener motor, which is vital when they are communicating for the first time.
Finally, gather your tools: your vehicle, the remote with a fresh battery, and a sturdy stepladder. Having everything on hand simplifies the process. If you discover your remote is missing or failing, exploring modern garage door accessories may be your best next step.
Programming for Rolling Code and Fixed Code Systems
Now, let's execute the programming. The most important factor is knowing whether your garage door opener uses a modern rolling code system or an older fixed code system. The final steps differ slightly, and this difference is key to a successful sync.
Fixed code systems, prevalent before the mid-1990s, transmit the same static signal each time. In contrast, rolling code systems, which now represent over 90% of openers installed in homes and businesses, change the signal with every use to enhance security, a feature that aligns with UL 325 safety standards.
Regardless of your system type, the initial training process is identical.
The Initial Training Process
First, you'll teach your car's HomeLink system to recognize your existing garage door remote.
- Sit in your vehicle with your handheld remote.
- Hold the remote 1-3 inches from the HomeLink button you want to program.
- Press and hold both the button on your remote and the desired HomeLink button in your car simultaneously.
Watch the indicator light on the HomeLink panel. It will begin with a slow blink and, after several seconds, should start flashing rapidly or turn solid. This change confirms that HomeLink has successfully captured the remote's frequency. Once the light changes, release both buttons.
If you have an older, fixed-code opener, you might be finished. Press the newly programmed HomeLink button. If the door operates, congratulations! For most modern openers we service across Texas and Oklahoma, however, there’s one more critical step.
Syncing with the Motor Unit
For any rolling code system, you must complete the process by introducing your vehicle to the garage door motor. This security measure authorizes your car as a trusted device.
- Using a stepladder, access your garage door motor unit and locate the "Learn" button.
- Press it once firmly and release. Do not hold it down. This activates the motor's pairing mode, which typically provides a 30-second window to complete the sync.
- Quickly return to your car and press the HomeLink button you just trained. Hold it for two seconds, release, and repeat this press-and-release sequence two or three times.
Success is confirmed when the opener's lights flash or you hear an audible click, followed by the door moving.
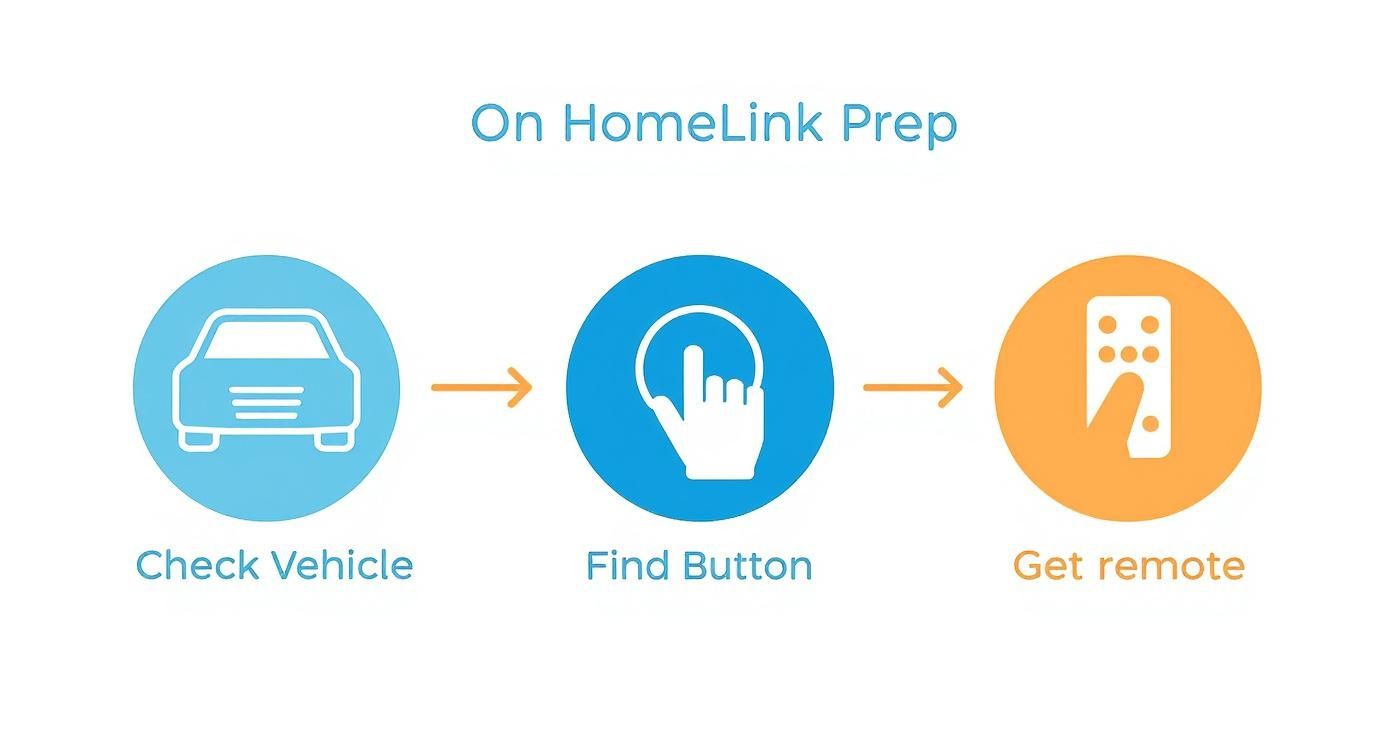
As shown, preparation is key: confirm vehicle compatibility, locate the HomeLink buttons, and have your original remote ready.
Business Application: We often assist business owners in places like Shawnee and Ardmore who need to program a main security gate and multiple commercial bay doors. The process is identical for each door. Simply assign a different HomeLink button to each access point for streamlined, centralized control from a single fleet vehicle.
If you've followed these steps and the door remains unresponsive, the issue may not be programming. Sometimes, the problem lies with the opener's internal logic board. In that case, our garage door opener repair team can provide a professional diagnosis for both residential garage doors and commercial systems.
Troubleshooting Common HomeLink Programming Issues
Even with perfect execution, technology can be unpredictable. If your HomeLink system isn't cooperating, don't get frustrated. The solution is usually simple and related to one of a few common culprits.
Signal interference is a major factor. Certain types of LED light bulbs can emit radio frequencies that disrupt the signal between your vehicle and the opener. This is a well-documented issue in the garage door industry. Before repeating the steps, try unplugging the opener, removing the bulbs, plugging it back in, and then re-attempting the programming sequence.
Another actionable tip is to check the battery in your original remote. A weak battery may not transmit a signal strong enough for the HomeLink system to learn correctly. A fresh battery is an inexpensive and highly effective troubleshooting step.
Diagnosing Deeper Syncing Failures
If basic troubleshooting doesn't work, it's time to investigate compatibility. Some older garage door openers, particularly those manufactured before 1995, use technology incompatible with modern HomeLink systems.
Practical Solution: We frequently encounter older homes and businesses around Texoma that require a HomeLink Compatibility Bridge. This small adapter plugs into an outlet near your opener and acts as a "translator," converting the modern signal from your vehicle into a command the older opener can understand.
It's also worth checking your vehicle for sources of interference. Metallic window tints, while excellent for blocking the Texas sun, can also impede the radio frequency signals from your HomeLink transmitter. Try the programming process again with the vehicle's windows down.
Troubleshooting is a process of elimination. This table helps diagnose the issue methodically.
Common HomeLink Problems and Solutions
| Symptom | Likely Cause | Actionable Solution |
|---|---|---|
| HomeLink light blinks rapidly but never goes solid. | Weak Remote Signal: The original remote's battery is failing and cannot transmit a consistent signal. | Replace the battery in your handheld garage door remote. |
| Programming seems successful, but the door doesn't move. | Rolling Code Sync Needed: The vehicle has learned the remote, but the opener motor has not yet learned the vehicle. | Press the "Learn" button on your garage door opener, then press the trained HomeLink button in your vehicle 3-4 times within 30 seconds. |
| The system won't respond at all. | Signal Interference: LED bulbs or other nearby electronics are blocking the radio frequency. | Unplug the opener, remove any LED bulbs, and retry. Check for newly installed electronic devices that could be causing interference. |
| Nothing works, even after trying all steps. | Compatibility Issue: Your garage door opener (often pre-1995) is incompatible with modern HomeLink versions. | Purchase and install a HomeLink Compatibility Bridge to serve as a translator between your vehicle and the opener. |
These tips should resolve most programming issues. The principles are universal, applying to garage doors and automated gates alike. You can find similar advice in these automatic gate troubleshooting and maintenance tips.
If you’ve tried everything and are still stuck, it could indicate a deeper problem with the opener’s logic board. When programming fails repeatedly, our expert garage door repair team in Texoma can find the root cause.
Unlocking HomeLink's Full Potential: Pro Tips and Advanced Features
Once you've programmed your main garage door, it's time to explore what else your HomeLink system can do. Many homeowners and facility managers in Texas and Oklahoma are unaware that its capabilities extend beyond a single door. Think of it as a central command hub in your vehicle for various radio-frequency (RF) controlled devices.
You can program the additional HomeLink buttons to control community security gates, exterior property lighting, or a second garage door on a workshop. The process is identical for each device, providing a clean, integrated solution for managing your entire property.
Bringing Older Garage Door Openers Up to Speed
A common challenge in older properties is an opener that is incompatible with modern vehicles. Before considering a full replacement, investigate a HomeLink retrofit kit. These kits are an excellent workaround, adding a new receiver that acts as a translator between your new car and your reliable old opener.
The market for these smart home and commercial automation solutions is growing rapidly. Industry analysis shows a strong consumer preference for retrofitting existing systems with new technology, which is a cost-effective alternative to complete replacement.
Actionable Tip for Businesses: If you're programming multiple access points (e.g., "Gate," "Bay 1," "Bay 2"), use a label maker to mark each HomeLink button. This simple step eliminates guesswork and improves operational efficiency, especially for employees using fleet vehicles.
By exploring these advanced applications and retrofit options, you can maximize the value of the technology already integrated into your vehicle. For more ideas on upgrading your property, check out the helpful information in our online resources.
Common Questions About Setting Up HomeLink
When syncing a HomeLink system with a garage door opener, a few questions consistently arise. Here are the answers we provide most frequently to our customers across Texas and Oklahoma.
Do I Really Need the Original Remote to Program HomeLink?
Yes, in almost all cases. A functional handheld remote is non-negotiable for the initial setup.
Your vehicle's HomeLink system is a learning device; it must "hear" the unique signal from your original remote to copy its frequency and security code. If your remote is missing or the battery is dead, programming cannot proceed. Securing a working replacement remote is the necessary first step.
How Can I Erase Old Codes from My HomeLink System?
Starting with a clean slate is best practice, particularly with a pre-owned vehicle. Wiping the system's memory is simple.
Press and hold the two outer HomeLink buttons simultaneously for about 20 seconds. The indicator light will eventually change from a steady light to a rapid flash, confirming that all previously stored codes have been erased. This prevents old signals from interfering with your new setup.
My Older Garage Door Opener Isn't Cooperating. What's Going On?
This is a common issue with openers manufactured before the mid-1990s. These older units often use "fixed-code" technology, which is incompatible with the modern rolling code security used in today's vehicles.
The typical solution is a HomeLink Compatibility Bridge. This device plugs in near your opener and effectively translates the modern, secure signal from your vehicle into a simple command that your older opener can understand and execute.
At Overhead Door Co. of Tex-Oma, we've handled everything from complex programming challenges to complete system installations for homes and businesses. If you're stuck or considering an upgrade to a more secure and modern garage door system, give our team a call.